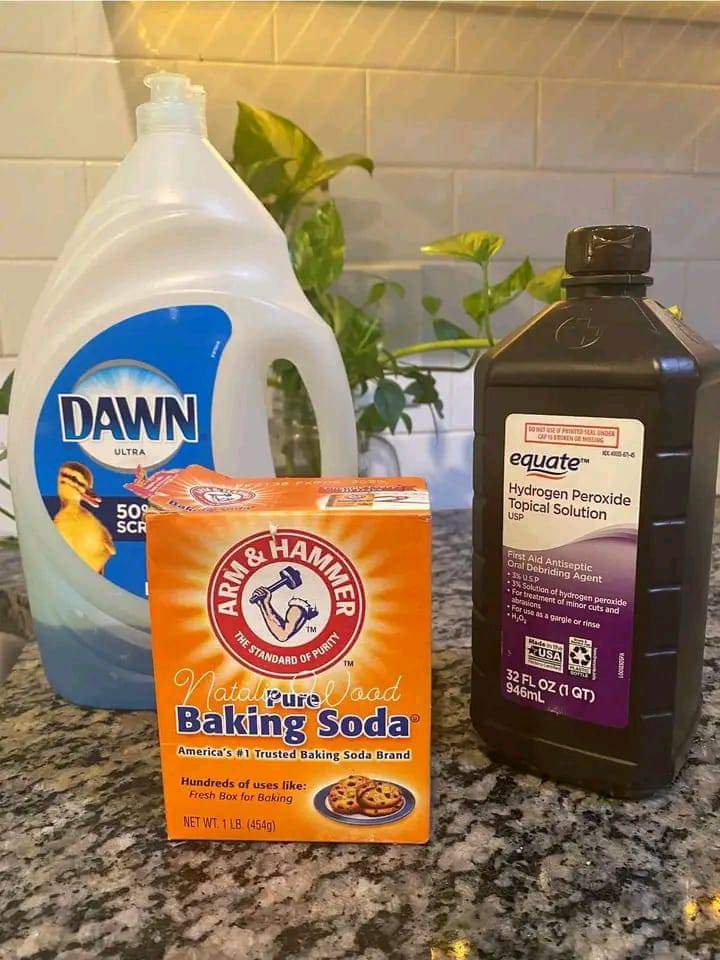
Are you tired of stubborn stains that refuse to budge, even after multiple washes? This homemade stain remover is a powerful solution that tackles set-in stains effectively. Many people swear by it, saying they’ll never need to buy commercial stain removers again. With just three basic ingredients—Dawn dishwashing detergent, hydrogen peroxide, and baking soda—you’ll have a solution that rivals even the most popular stain removers on the market.
Why This Stain Remover Works So Well
Each ingredient in this DIY stain remover has its own cleaning properties, and when combined, they create a powerful formula that cuts through even the toughest stains.
- Dawn Dishwashing Detergent: Known for its grease-cutting power, Dawn detergent breaks down oils and other residue that can trap stains in fabrics.
- Hydrogen Peroxide: This common household disinfectant also works as a bleach alternative, lifting and breaking down stains without the harsh effects of chlorine bleach.
- Baking Soda: As a mild abrasive, baking soda gently scrubs away embedded stains and helps to neutralize odors.
DIY Stain Remover Recipe
To make this powerful stain remover, you’ll need:
- 1 teaspoon Dawn dishwashing detergent
- 3-4 tablespoons hydrogen peroxide
- 2 tablespoons baking soda
Optional: You can make a larger batch, dilute it with water, and store it in a spray bottle for convenient use.
Instructions for Removing Stains
- Mix the Ingredients: In a small bowl, combine the Dawn detergent, hydrogen peroxide, and baking soda. Stir until the baking soda is fully dissolved, creating a thick paste.
- Apply the Mixture: Use a scrubbing brush or an old toothbrush to apply the stain remover directly to the stain. Gently scrub the paste into the fabric, working in circular motions. This will help the mixture penetrate deep into the fibers and lift the stain.
- Let It Sit: Allow the solution to sit on the stain for 10-15 minutes. For more stubborn stains, you can leave it on for up to an hour.
- Rinse and Wash: After the mixture has set, rinse the area with warm water to remove any residue. Then, wash the fabric as usual in your washing machine. For best results, check that the stain has completely lifted before putting the fabric in the dryer, as heat can set the stain.
For Set-In Stains
For tougher, set-in stains, apply a second round if needed. This stain remover works well on all types of stains, from grease and oil to grass, blood, and coffee.
Tips for Best Results
- Pre-Treat Before Washing: Spray the mixture onto stains before tossing clothes into the washing machine. This works especially well for fresh stains and can help prevent stains from setting in.
- Use a Spray Bottle for Convenience: Make a larger batch by doubling or tripling the recipe, then add water to dilute it slightly. Store the solution in a spray bottle for easy, on-the-go stain removal.
- Test on a Small Area: Although this mixture is generally safe for most fabrics, always test it on a small, hidden area first to ensure there’s no discoloration.
Why People Love This Stain Remover
Users love this DIY solution because it’s:
- Affordable: The ingredients are cost-effective and easily found in most households.
- Eco-Friendly: No need for harsh chemicals; this solution is gentler on fabrics and the environment.
- Highly Effective: Tackles a wide variety of stains, even those that have set over time.
Stains This Mixture Works Well On
This stain remover is versatile and can handle most common stains, including:
- Grease and oil stains
- Grass stains
- Blood stains
- Wine and coffee stains
- Ink stains
By adding this to your cleaning routine, you’ll have a reliable, effective solution for even the toughest stains, keeping your clothes fresh and stain-free without relying on commercial products.
